Adding a new branch
To protect the integrity of the main branch and avoid overwriting updates from someone else, it is recommended to create a branch for each new piece of work. Branches could be named by feature_[topic name] or fix_[topic name]. Branches can be created either through the coArchi plugin or via Github.com.
Via the coArchi plugin
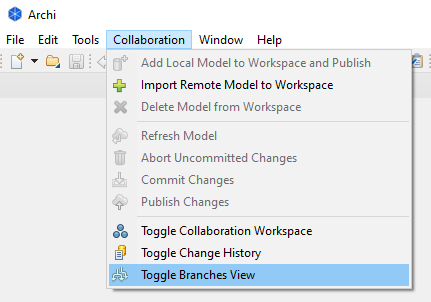
- In Archi, select [Toggle Branches View] from the Collaboration menu.
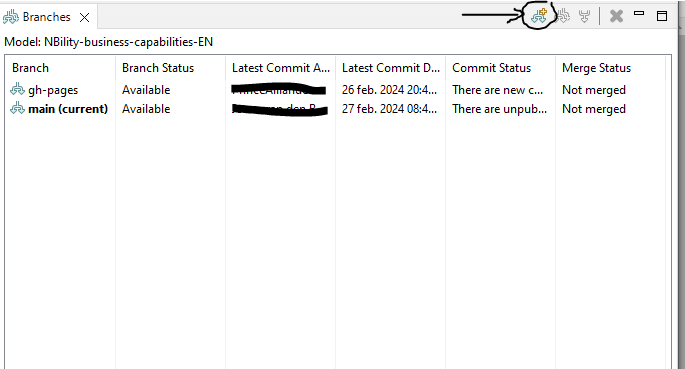
- In Branches Workspace, click on the [Add branch] icon.
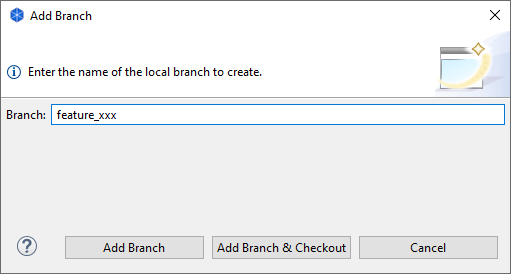
- Select [Add branch and checkout]. This will create the local topic branch and set it as the active branch. This action won't create the upstream branch (on Github server yet).
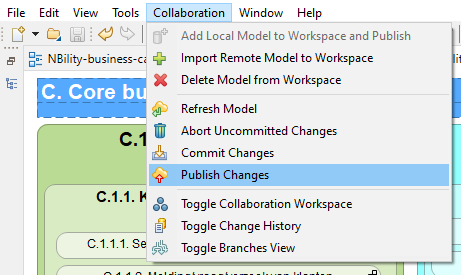
- The final step is to publish the new topic branch. This will make the new topic branch available on GitHub.co. To publish your new topic branch, select [Publish changes] from the Collaboration menu.
- To ensure that your new topic branch have been successfully published, you can verify by visiting your topic branch on https://github.com/NBility-Model to see if your new topic branch appears in the specific repository you've worked on.